Creating Highlight Tree Structure
Overview
The Network Explorer comprises folders and locations. Folders may contain other folders and/or locations. Only those with the permission Manage folders/locations will be able to complete these steps.
Watch the admin training videos for Manage folders and Manage locations
Create a folder
Select the containing folder from the Network Explorer panel.
From the Admin tab, click Browse, click + Create New... and select Folder. Note: if Folder is not listed, ensure the required parent folder is selected in the Network Explorer tree

The following dialog appears with the fields explained below:
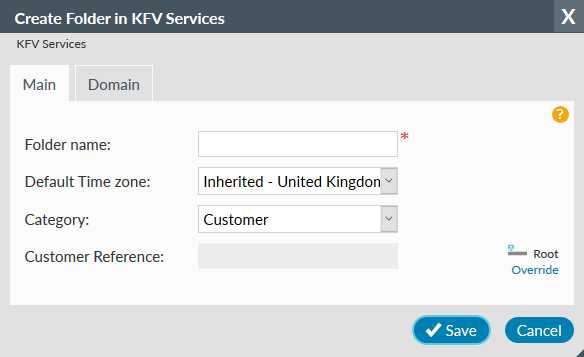
- Folder name
- Enter the folder name, which may contain spaces and does not need to be unique
- Time zone
- Select a time zone which will initially apply to new subfolders and locations created in this folder; if unchanged the time zone is inherited from the parent folder - see the Time zone section below for more details
- Category
- If shown, select Internal Group for a service provider folder, Customer otherwise
- Customer Reference
- An optional reference of up to 100 characters can be set on a Customer folder. This reference will then be applied to every watch in this folder and any subfolders (unless overridden) and can be shown in Reporting.
- Store details
Edit a folder
Edit the selected folder using the cog to the left of the folder icon.
1. Main tab
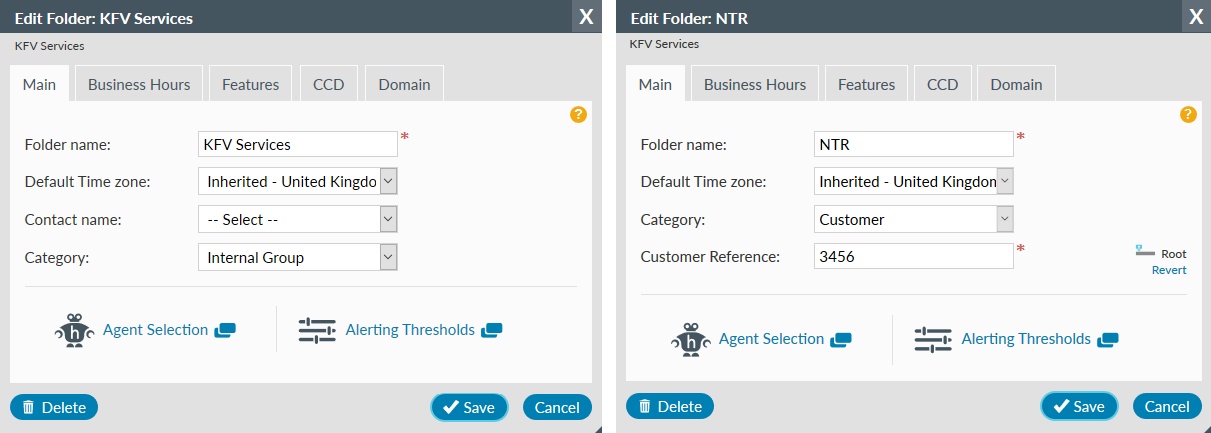
- Folder name
- Edit the folder name if required
- Time zone
- Select a time zone which will initially apply to new subfolders and locations created in this folder; if unchanged the time zone is inherited from the parent folder - see the Time zone section below for more details
- Contact name
- (Optional) If available select a user from those created in this folder. The contact name will be sent an email (from the noreply@highlight.net address) when a watch is activated via the Admin Pending page.
- Category
- If shown, select Internal Group for a service provider folder, Customer otherwise
- Customer Reference
- An optional reference of up to 100 characters can be set on a Customer folder. This reference will then be applied to every watch in this folder and any subfolders (unless overridden) and can be shown in Reporting.
- Agent Selection
- Refer to the Agent selection page for details on assigning an agent or agent group as a Flow collector, for Web testing, or as a Poller.
- Alerting Thresholds
- Set thresholds for WiFi, Bearers, Classes and Broadband. See the Alerting Thresholds page for further details
2. Business Hours tab
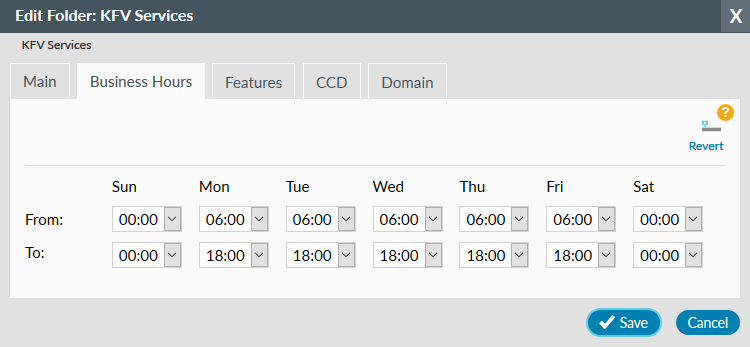
Highlight uses business hours when displaying traffic trend graphics, for filtering report results, and when generating alerts.
See the Business Hours page for further details on the settings involved.
3. Features tab
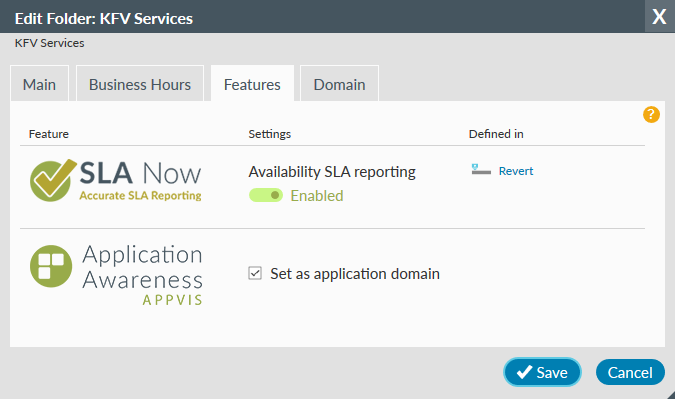
Use this tab to enable or control features, such as SLA reporting and AppVis.

For a general overview on SLA Now, watch the SLA Now video.
Settings on a parent folder are inherited in subfolders unless overridden.
Users with the Manage folders/locations permission can see the Features tab but not enable or disable SLA Now unless they also have the Edit watches permission. Users without the Edit watches permission will see the message You don't have permission to change this

This section is only visible if AppVis is enabled for this folder. Setting this folder as an application domain means AppVis applications can be assigned to groups which will be visible in this folder and in any subfolders. The check box is disabled if an application domain is already set in a parent folder. If you have visibility of that folder Defined in shows the path to that parent folder.
4. CCD tab
If displayed, this tab provides the means to set the class names of interest for Highlight to autodiscover and report on.

See the Define Classes section on the Class Autodiscovery page for further information about class discovery.
See the CCD page for full details on the settings involved.
5. Domain tab
If this folder is a domain, then you see the domain name, URL(s), and whether switching to other domains is allowed. Contact us if you are interested in domains.
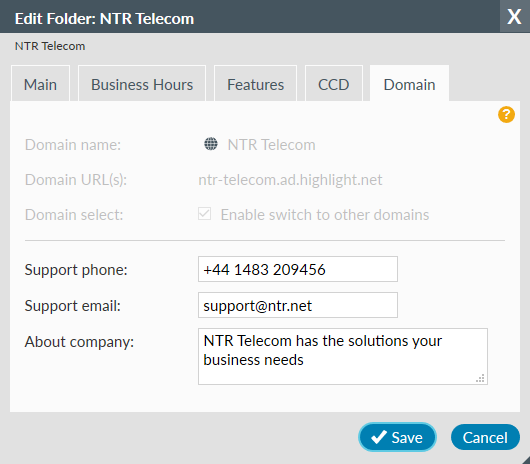
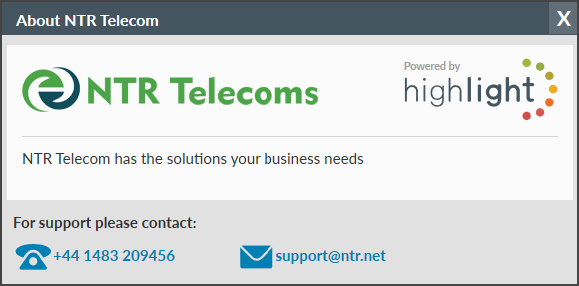
The dialog enables you to edit the specific company information which is accessed from
- Contact provider
- On the home page
- Domain contact details
- From the user menu/side bar
- Provider logo
- On the Details page
The fields in this dialog are optional but, if empty, the panel will also be empty.
- About company
- an optional free-text field - the contents appears in the main body of the About panel
- Support phone
- an optional number you'd like your users to contact for help
- Support email
- an optional email address
Override and Revert
If the word Override is showing and the input fields are greyed out, this means the current settings are inherited from a folder further up the tree structure.
To alter the inherited values for this folder and any subfolders, click Override and change the text.
If the word Revert is showing and the input fields are editable, this means the current settings are locally defined in this folder.
To return to the parent folder settings, click Revert and

Edit a folder Authentication tab
Highlight supports multi-factor authentication and single sign-on through a process called Federated Authentication where password authentication is handed off to a third-party OAuth directory (typically Microsoft Azure AD).
Authentication tab
Users with both the Manage folders/locations and Manage authentication permissions can edit the Authentication tab
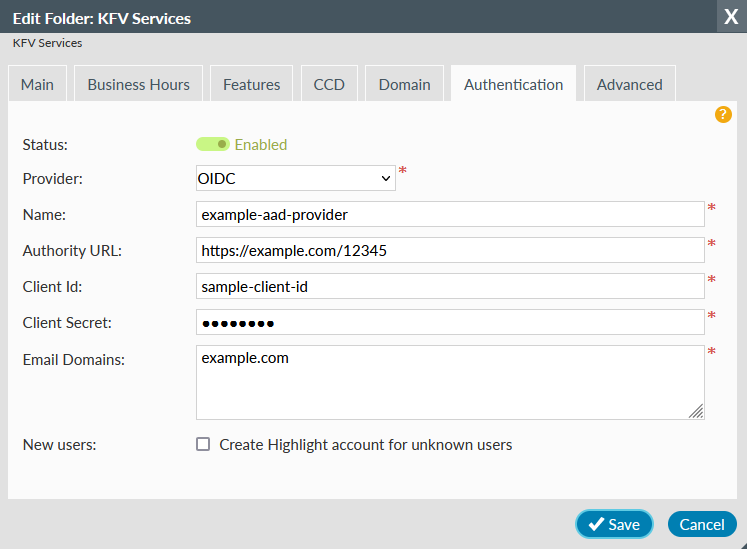
Use this tab for administering federated authentication (SSO) on a folder. This applies to all users at this folder level and below.
- Status
- Enabled or Disabled, disabled keeps the information in Highlight but not applied
- Provider
- Currently the only option is OIDC
- Name
- Enter a unique name for the authentication provider. The name can be up to 50 characters including a-z, 0-9 and dash. The name will be stored in lower case. This field is required.
- Authority URL
- Enter a valid Https URL up to 1024 characters for an OIDC provider. If Highlight cannot acquire a discovery document for the URL entered, then the URL is not recognised as an OIDC provider. This field is required.
- Client ID
- Enter up to 50 characters for the Client ID. This field is required.
- Client Secret
- This can be up to 1024 characters and is obscured on input. This field is required.
- Email domains
- Enter a comma-separated list of domain names up to 2048 characters in total. This field is required.
- New users
- Create Highlight account for unknown users
Check to have Highlight automatically create these accounts if the user has not previously logged in but has passed the authentication checks by the third-party provider. This is useful as new staff joining an organisation will be able to log into Highlight with no other admin intervention.
Auto-created users have no expiry date and the standard permissions (which include viewing heat tiles and details page, creating alerts and running reports). Extra admin permissions can be granted by other admin users if required.
Create a location
Select the containing folder from the Network Explorer panel.
From the Admin tab, click Browse, click + Create New... and select Location

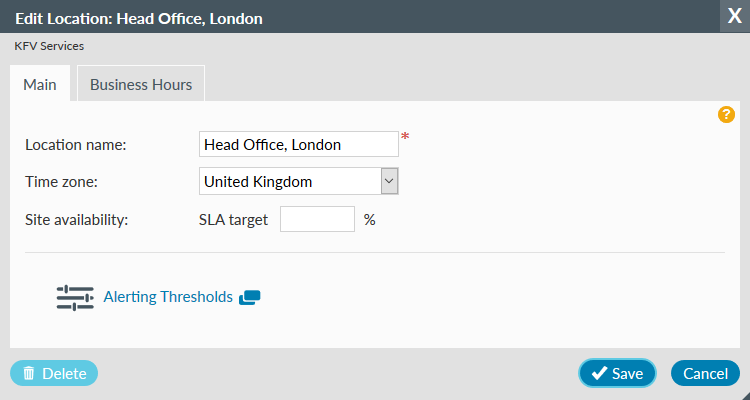
The following dialog appears with the fields explained below:
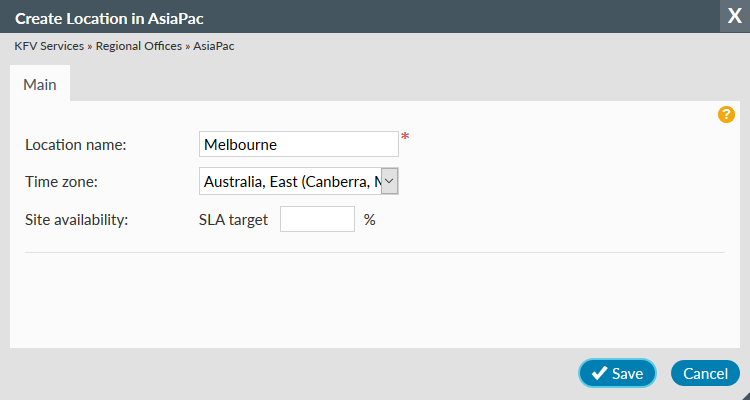
- Location name
- Enter the location name, which may contain spaces and does not need to be unique. Maximum length 100 characters.
- Time zone
- The default is inherited from the parent folder. Use the drop-down to change the country/time zone for this location. See the Time zone section below for more details.
- Site availability
- SLA target %. An optional field, used in Reporting to compare actual site availability with this SLA. Enter a number between 0 and 100 with up to 3 decimal places, such as 99.999
- Store details
From a location you can now create a watch.
Edit a location
Edit the selected location using the cog to the left of the location icon.
The following dialog appears with the fields explained below:
1. Main tab
- Location name
- Edit the location name if needed, which may contain spaces and does not need to be unique. Maximum length 100 characters.
- Time zone
- Select from the drop-down list. See the Time zone section below for more details.
- Site availability
- SLA target %. An optional field, used in Reporting to compare actual site availability with this SLA. Enter a number between 0 and 100 with up to 3 decimal places, such as 99.999
If SLA Now is disabled on the Features tab of a parent folder, then this field will not be available to edit. - Alerting Thresholds
- Set thresholds for WiFi, Bearers, Classes and Broadband. See the Alerting Thresholds page for further details
- Delete any watches, pending watches and users before a location can be deleted
- Store details
Find out more about SD-WAN
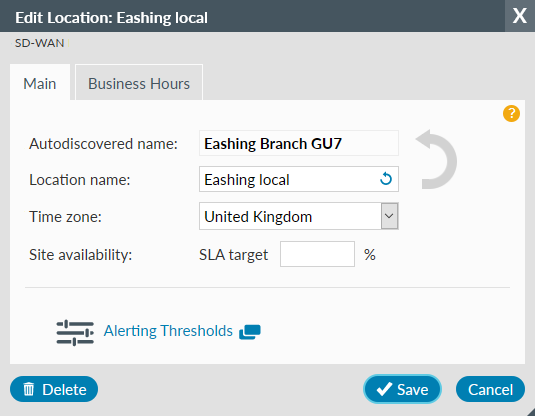
SD-WAN locations
- Autodiscovered name is auto-generated on creation of an SD-WAN controller. Autodiscovered name cannot be changed in Highlight. Autodiscovered names differ for supported vendors and use the following information:
- Cisco Meraki: Network name (these update if changed in the Meraki dashboard)
- Cisco Catalyst: "Site " followed by the Site ID
- Fortinet: Device name
- Location name initially matches the autodiscovered name but can be changed. The location name displays everywhere in Highlight instead of the autodiscovered name if it has been changed. Use to revert the location name to the autodiscovered name.
2. Business Hours tab
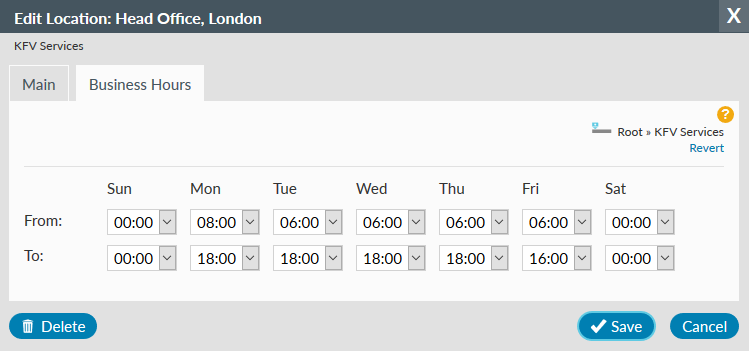
Highlight uses business hours when displaying traffic trend graphics, for filtering report results, and when generating alerts.
See the Business Hours page for further details on the settings involved.
Time zone
The time zone of a watch is used in the charts on the Details page. On the Details page it's possible to view a watch in other times zones including UTC and your time zone - as detected from your browser.
Time zones in Highlight are designed to work in a flexible way. On folders, you can set a Time zone. This time zone will then be applied to any subfolder or location created under that folder.
Folders
If the time zone on a folder is set to "Inherited - Country/time zone" then the folder inherits the time zone from its parent folder. Any locations created in this folder show the same "Inherited - Country/time zone." If the time zone on a folder is set to a specific time zone (e.g. "USA, Eastern Time (-5)") then any locations created in this folder show the same time zone.
Locations
The time zone on a location can be manually changed at any time. If the time zone on a location is set to "Inherited - Country/time zone" then if that location is moved to another folder, the time zone on that folder will be applied to the location. If the time zone on a location is set to a specific time zone (e.g. "USA, Eastern Time (-5)") then moving the location will not change the time zone.
Contact us if you do not find the country or time zone you need or for any questions about time zones.